How to Prep and Paint Your Interior Home | Pro Painter’s Step-by-Step Guide
Learn proven techniques I was taught by a professional painter, plus the exact system I use daily for clean, long-lasting results.
Introduction:
Hey, I’m Ralf. I’ve been painting professionally for over 6 years in Brandon, MB, and I was taught directly by an old-school painter who’s been in the trade for decades. He passed down a ton of tricks and techniques that I still use daily that really make a difference in quality.
Whether you're a DIYer or just want to know how a pro does it, this is the system I use on real jobs, every day.
Step 1: Identify What You’re Painting – Ceiling, Trim, or Walls?
Before doing anything else, figure out exactly what surfaces are getting painted: ceilings, trim, walls, or all three. That changes how you prep the space.
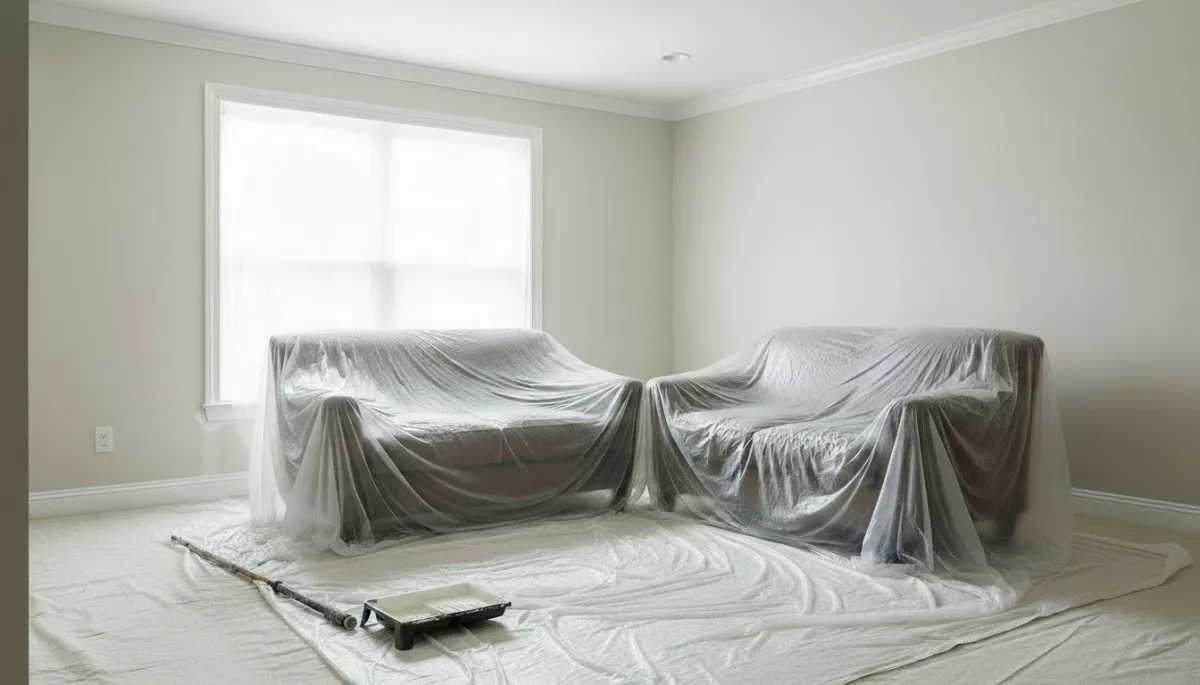
Step 2: Move and Cover Furniture, Floors, and Fixtures Before Painting
If painting ceilings:
Leave the furniture against the walls and cover it with plastic. This gives room in the middle of the room to move a ladder around and properly roll the ceiling. Also cover the floors with drop cloths and tape plastic up along the walls to protect pictures, doors, windows, and anything else from ceiling splatter.
If painting walls too:
Take all the wall décor down, move the furniture to the center of the room, cover it in plastic, and drop cloth the floor around it.
Remove or cover:
Outlet covers
Light fixtures
Curtain rods
Vents
Step 3: Gather the Essential Painting Tools Before You Start
Make sure you have everything you need before painting:
Drop cloths and plastic
Pole sander and 150–220 grit sandpaper
Yellow Frog Tape
Caulk, spackling tools
Rollers, trays, brushes, extension poles
Drydex for patching — it goes on pink and dries white, so you know exactly when it's ready to sand and paint
[I’ll be putting together a future post with my full Interior Painting Tool Checklist, stay tuned for that if you want to gear up right.]
Step 4: Picking the Best Paint Finish for Ceilings, Walls, and Trim
Here’s what I usually go with and why:
Ceilings: Flat white — it hides imperfections and doesn’t reflect light, so you won’t see streaks. I use Promar 400.
Walls: Sherwin-Williams Emerald Matte — smooth, hides flaws, and has a premium look
Trim and doors: Satin or semi-gloss — easier to clean and more durable. I use ProClassic, which is known for its self-leveling ability, helping hide brush strokes and roller marks
I’ll also be posting a full guide soon on paint finishes and when to use what, that’ll be helpful if you’re trying to decide.
Step 5: Properly Sand and Paint Your Ceilings for a Flawless Finish
Start by pole sanding the entire ceiling to get rid of any flaking paint and smooth out the surface.
Then:
Patch and sand any imperfections using Drydex.
Use a mini roller to get into the corners and roll along the edge where the wall meets the ceiling., Use a brush to cut around light fixtures. It’s totally fine to get some paint on the walls, they’ll be painted later anyway.
Use a 14" roller with a 13mm nap — the Purdy Marathon is my go-to because it holds a lot of paint and makes rolling easier and faster
Important note: When rolling the ceiling, always roll in the opposite direction from where the natural light is coming in from the windows. So if light is coming in from the north, roll from west to east (perpendicular to the light). This helps hide streaks and makes the finish more even.
Once the first coat dries, lightly pole sand again, then apply the final coat.
Step 6: How I Prep, Paint, and Tape Trim the Right Way
Trim takes a few key steps to get clean, pro results:
Sand all the trim with a sanding sponge with a fine 220 grit
Caulk all the joints, gaps, and corners
Patch and sand nail holes or dents using Drydex
Roll two full coats on all the trim. Make sure you apply 2 coats, this helps hide any patches from showing through the final finish
Wait at least one day, ideally two, before taping off the trim to roll the walls. That way the paint won’t peel when removing the tape. Once fully dry, tape it off using yellow Frog Tape to keep it protected. Even pros get splatter when rolling, this step is worth it.
[I’ll also be publishing a guide soon on how to properly apply painter’s tape to avoid bleed, watch for that too.]
Step 7: How to Patch, Spot Prime, and Paint Interior Walls Like a Pro
Before the first coat, patch any big, visible flaws using Drydex. Don’t go crazy with fine details yet.
Then roll the first coat of wall paint. Once it’s dry, walk around the room with a light and look closely, that’s when all the little imperfections become easy to see. Patch those, sand smooth, and spot-prime using the same roller sleeve you’re using for the rest of the wall to avoid flashing.
Once the spot-primed areas are dry, finally roll the final coat.
Tape Tip: As soon as you finish rolling, pull the tape right away while the paint is still fresh. If you wait too long and the paint dries, the tape will rip and mess up your edge.
Step 8: How I Do a Clean Finish and Final Inspection After Painting
Once everything’s painted and the tape is pulled, check every room under natural light to catch any missed spots or touch-ups.
Clean up the gear, roll up the drop cloths slowly to prevent any dust going on the freshly painted walls, and leave the space looking sharp and ready to enjoy.
Final Thoughts: Do It Right, or Let Us Do It for You
Painting your interior home yourself is possible, but it takes prep, patience, and experience. If you're up for it, this guide gives you the exact steps to follow.
But if you'd rather avoid the stress, Ralf’s Painting is ready to help. We proudly serve Brandon, MB, Carberry, Shilo, Minnedosa and surrounding areas with interior painting done right, clean, crisp, and guaranteed to last.
FAQs
Q1. Can I skip sanding the ceiling if it looks okay?
No, sanding helps the paint stick better, remove flaking paint and gives a smoother result, especially under light.
Q2. When should I patch and when should I just paint?
Patch the bigger stuff before your first coat. After that, do a detailed check under light to catch the smaller flaws. Make sure to spot prime the patched areas before applying the final coat to avoid flashing.
Q3. Why pull tape right after painting?
If you wait too long, it dries and rips. Pull it while the paint’s still fresh for clean lines.
Q4. Do I really need to tape trim if I’m careful?
Even the pros get splatter when they roll the walls. Taping trims is worth it for a crisp, clean line.
Q5. How long should I wait between coats of paint?
Generally 2–4 hours between coats, but always check the paint can for the manufacturer’s recommended time.
Q6. Do I really need to use primer before painting?
Only if you're painting over patches, stains, bare drywall, or switching from dark to light colors. Spot priming is usually enough.